
How to Create a Post on Dizzy
Learn how to create posts on Dizzy using text, media uploads, visibility options, scheduling, and premium content with point-based access.
How to Create a Post on Dizzy
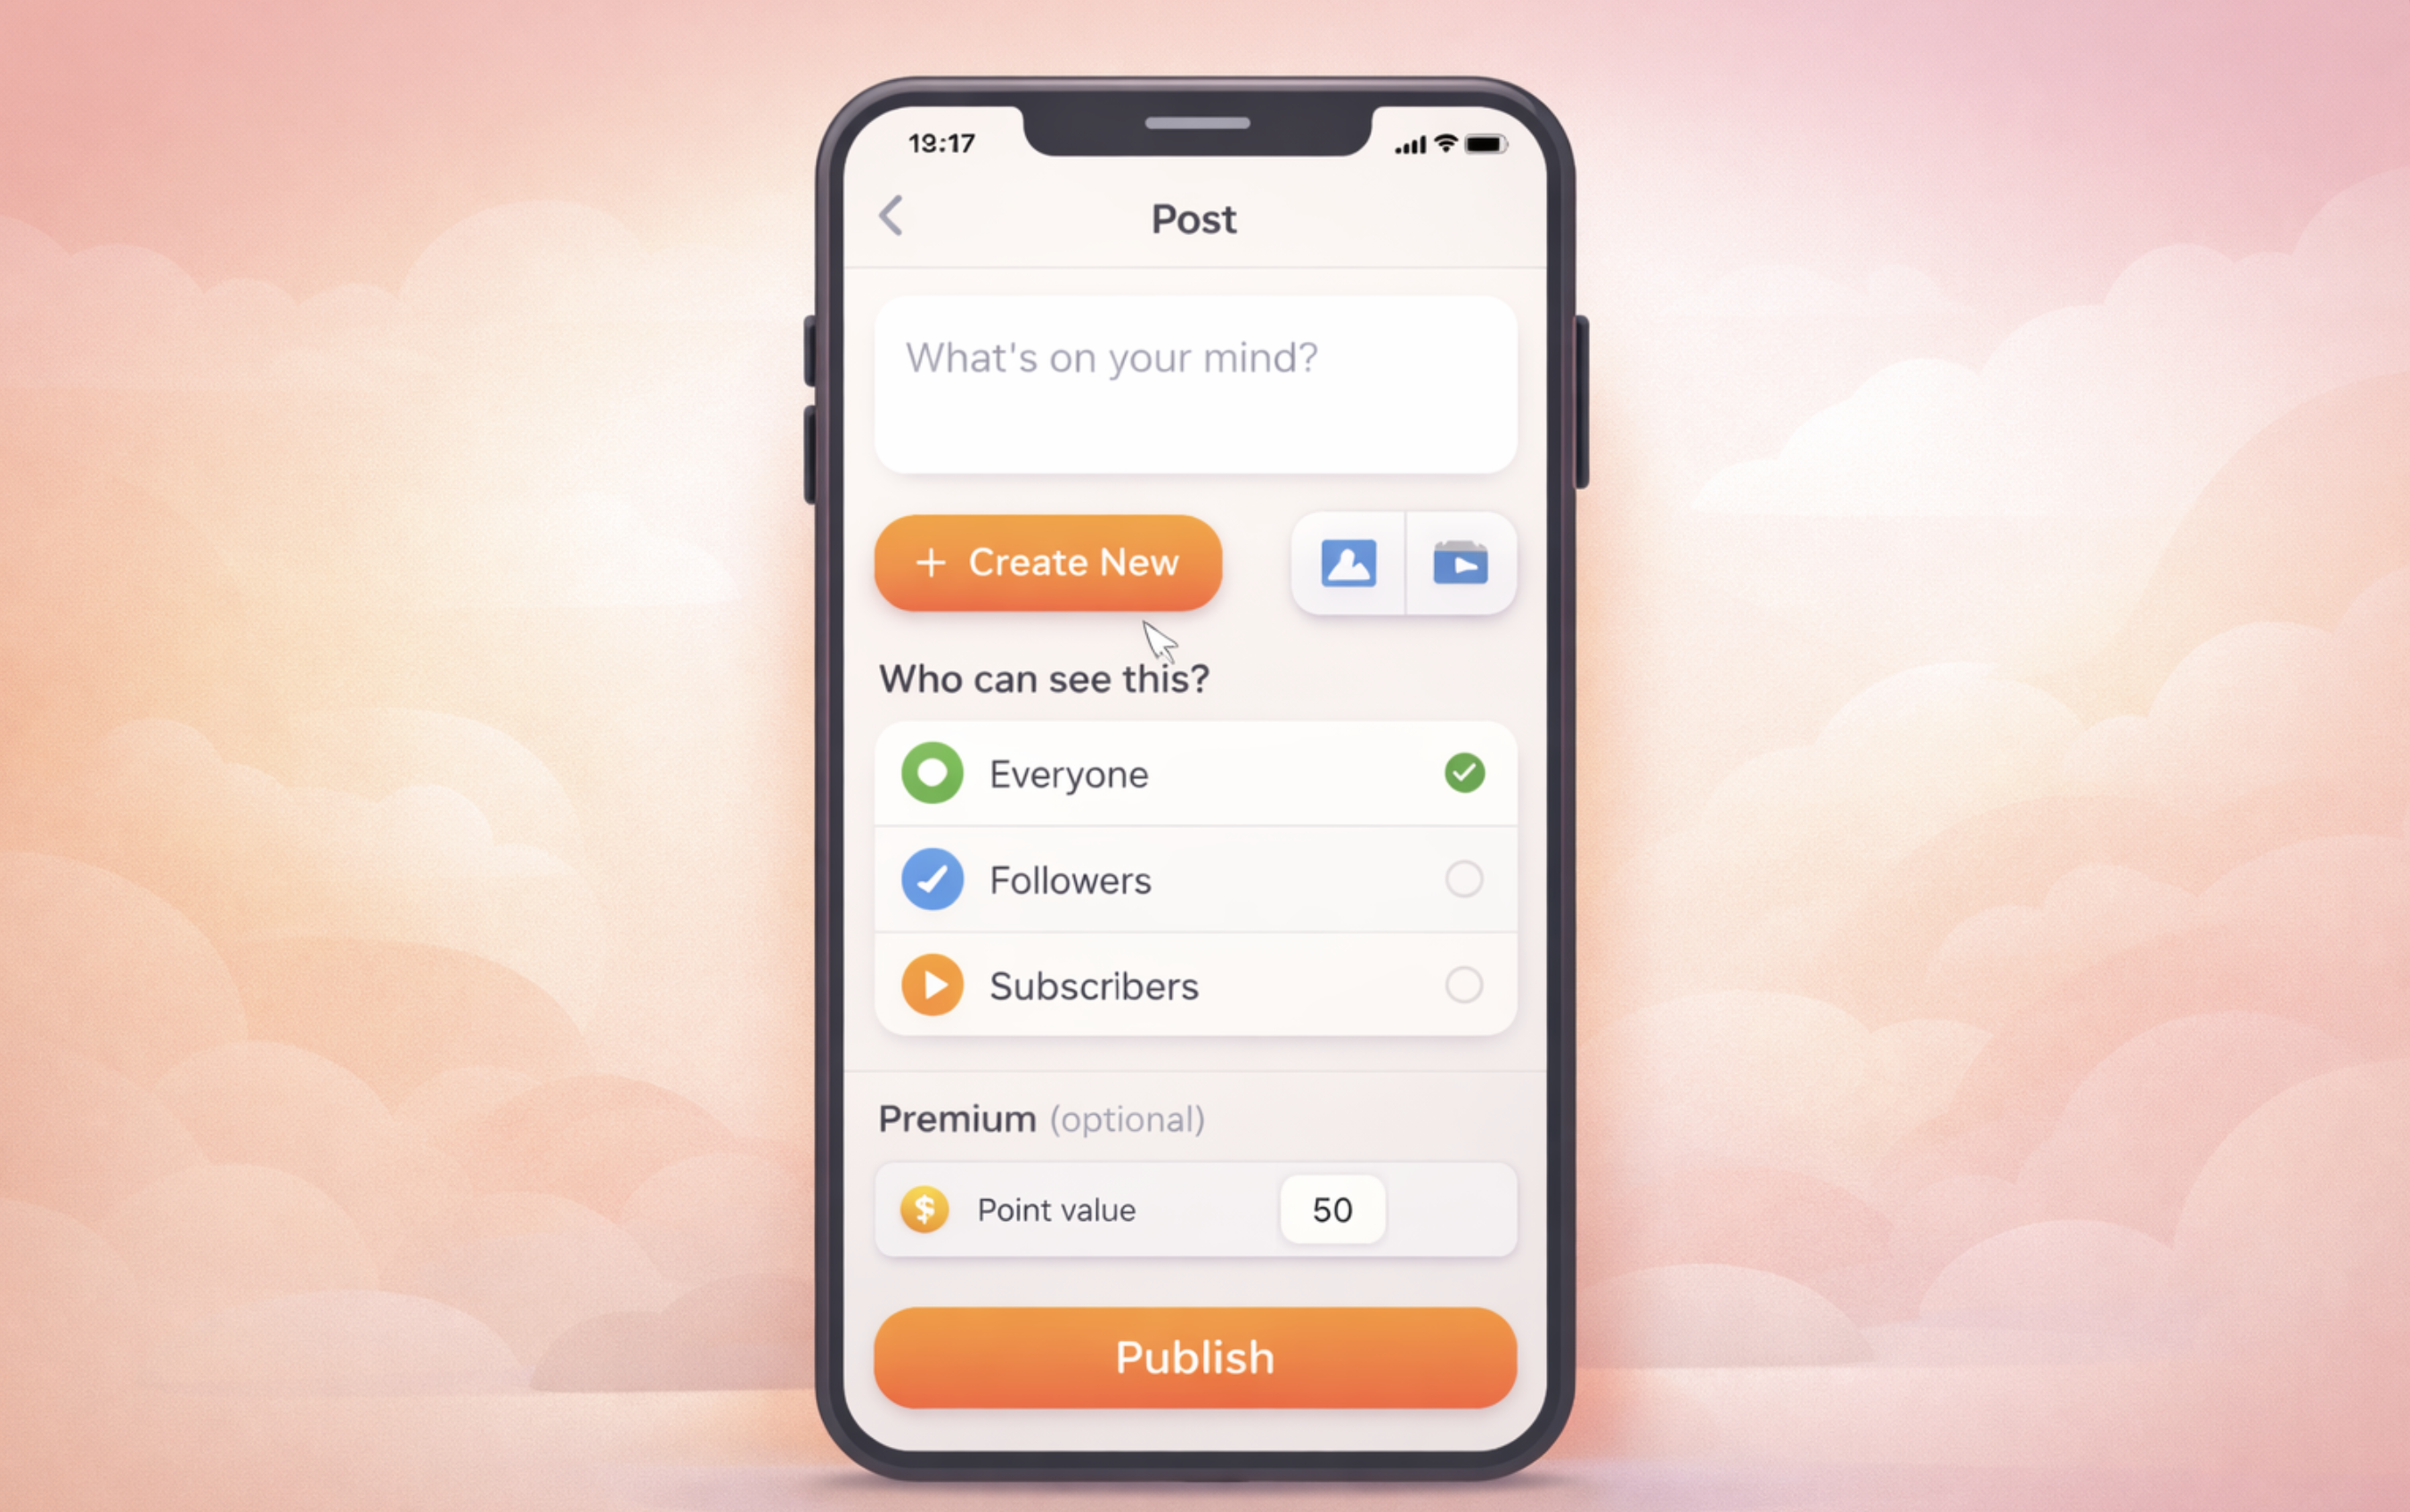
Dizzy’s posting interface brings together text input, media uploads, and visibility settings in a single, streamlined composer. You can create anything from a simple text update to a media-rich post, or even publish premium content designed to generate revenue.
Step-by-Step Post Creation Process
Write Your Text
Enter your message in the post editor. This field supports @mentions and #hashtags, allowing you to reference users and categorize your content.
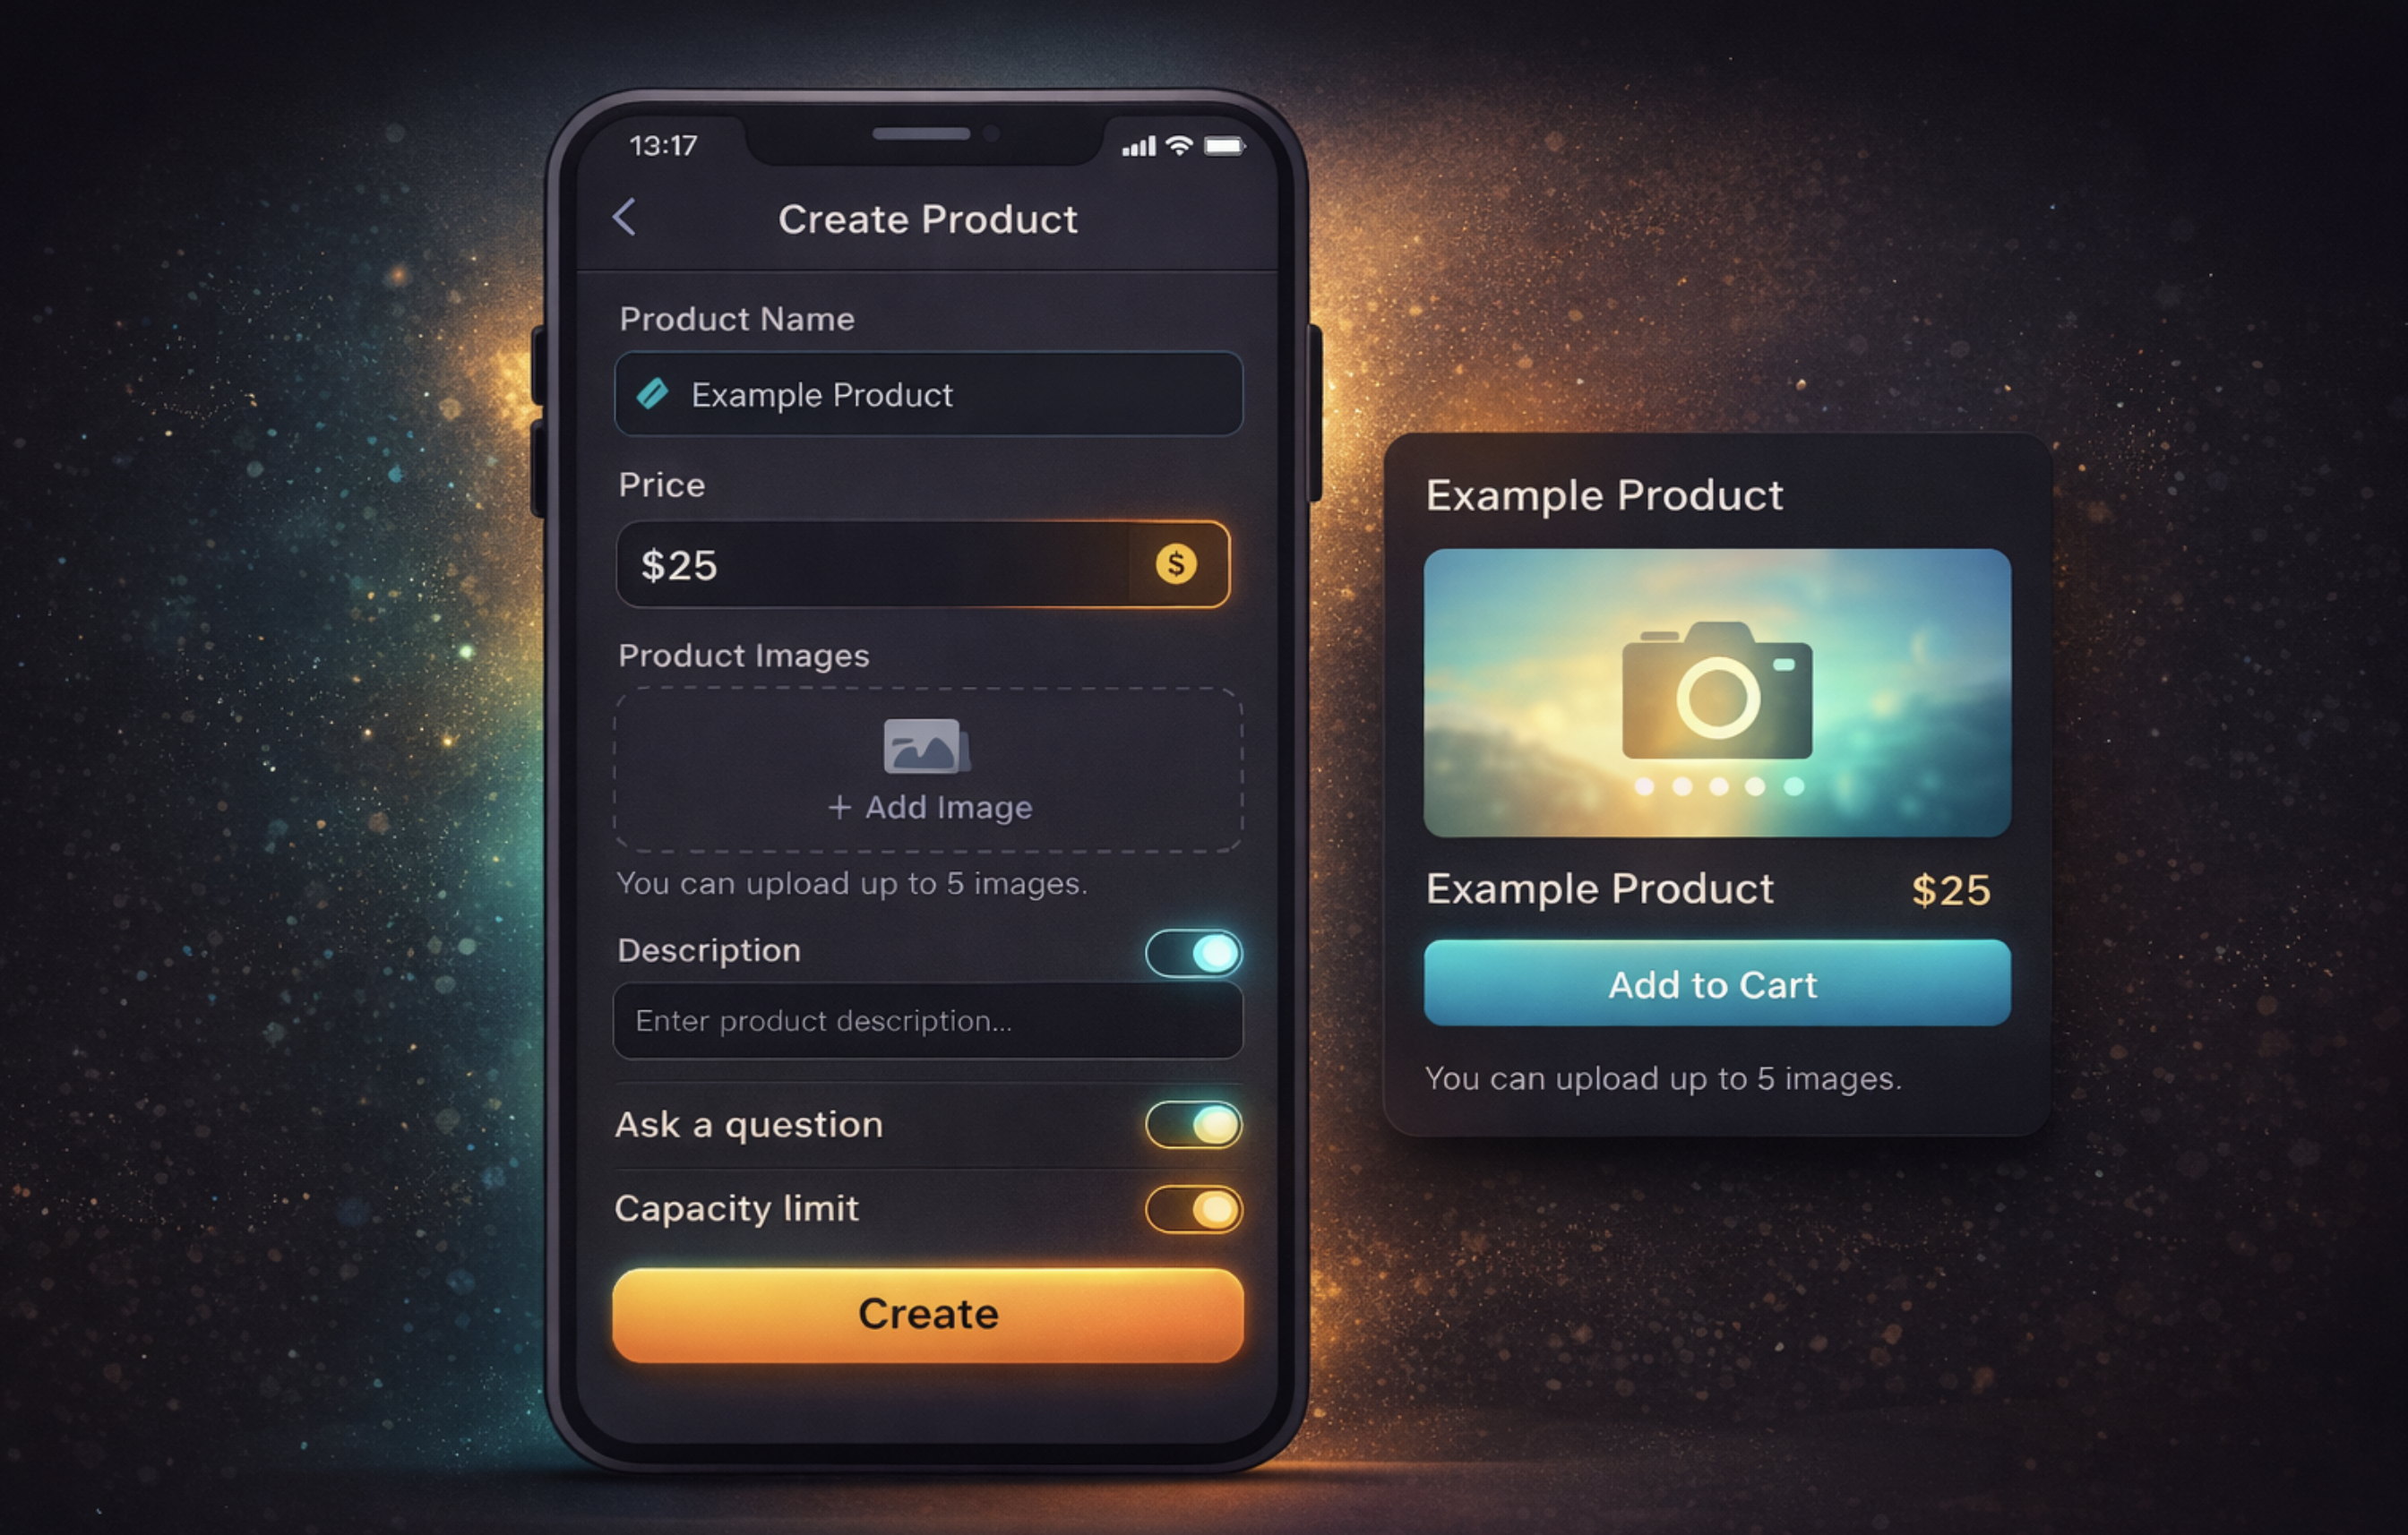
Add Media (Optional)
From the “Create New” menu, you can upload files by selecting “Upload Video, MP3, or Images.”
If you are uploading a video, the MP4 format is recommended.
Select Visibility
Use the “Who can see this?” option to define your audience. You can choose between:
-
Everyone
-
Followers
-
Subscribers
This allows you to control who has access to each post.
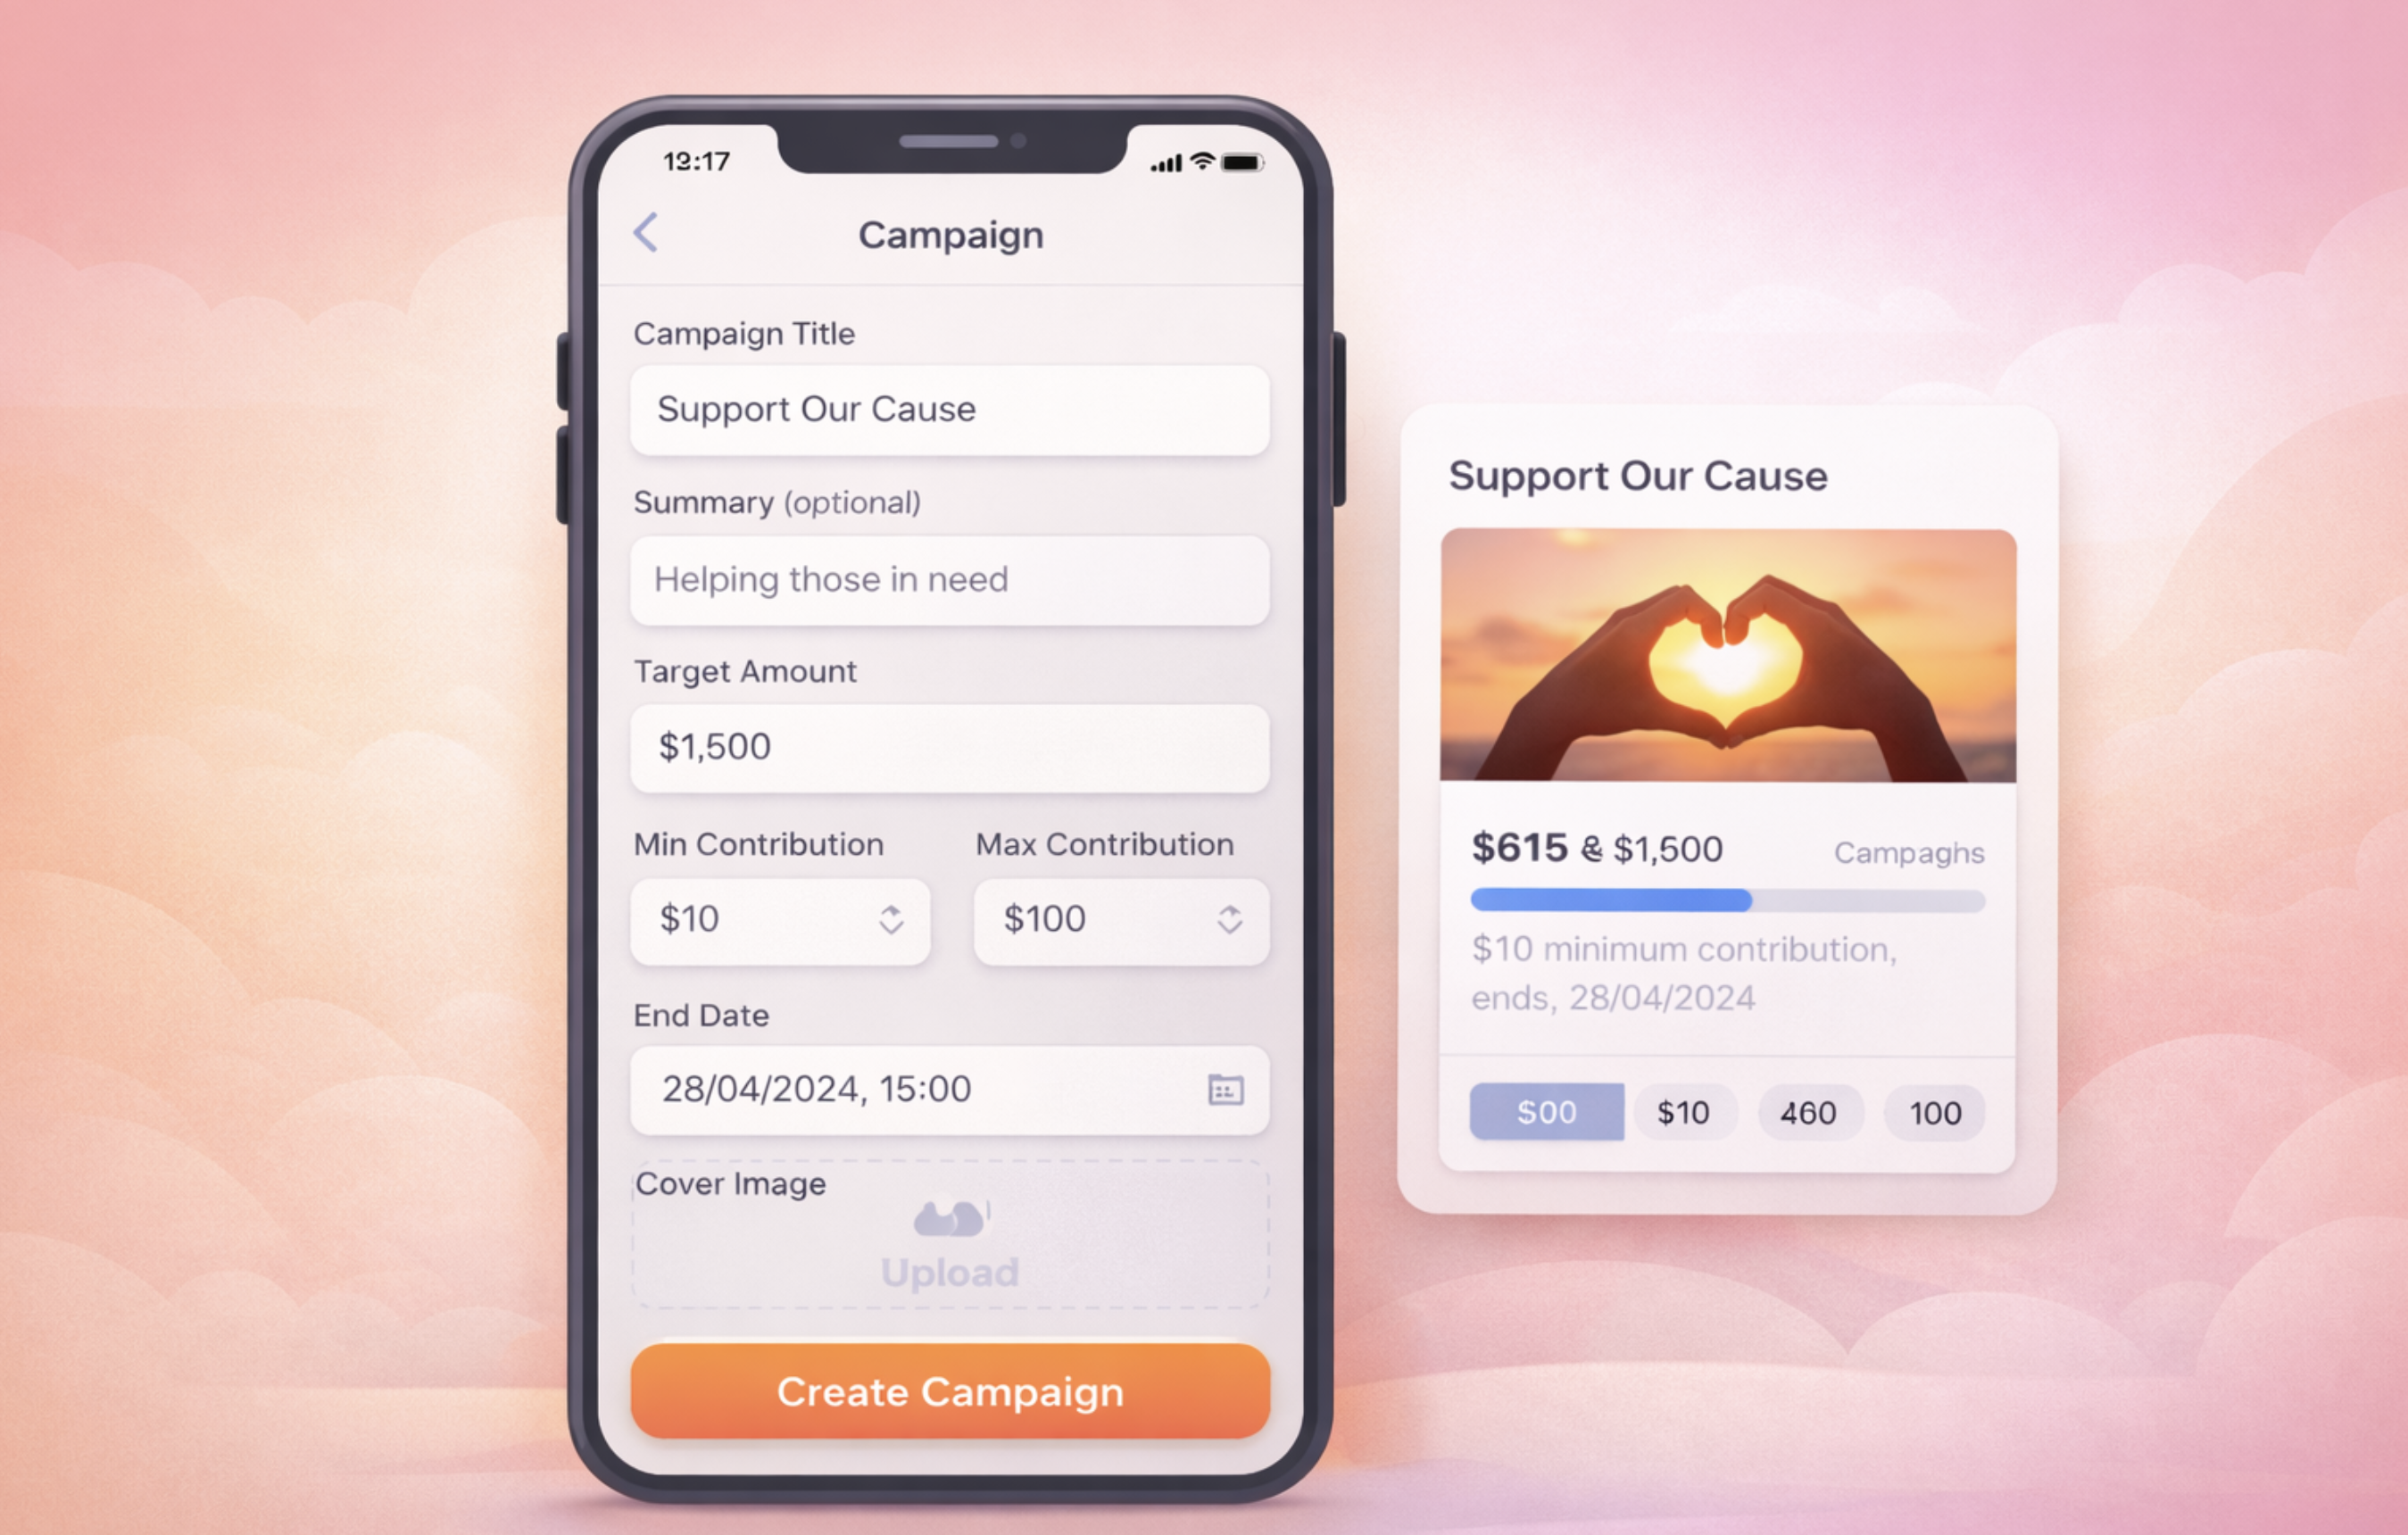
Create a Premium Post (Optional)
To publish a premium post, you must assign a point value. For premium posts:
-
Uploading a file is mandatory
-
The point value must be entered as a valid number
Premium posts are designed for paid and exclusive content.
Publish Immediately or Schedule
You can choose to publish your post right away using “Publish,” or schedule it for a future date using the “Schedule Post” option.
Quick Tips
-
If you attempt to publish without adding text or media, the system will display a warning.
-
Premium posts are ideal for offering exclusive content that can be unlocked using points.

Comments