
How to Create a Reels Video on Dizzy
Learn how to create Reels videos on Dizzy, including video uploads, processing, visibility settings, premium options, and publishing steps.
How to Create a Reels Video on Dizzy
Reels on Dizzy is one of the most effective ways to achieve fast engagement through short and dynamic videos. Once the Reels feature is enabled by the administrator, both content creators and users can start producing Reels content on the platform.
Reels Creation Steps
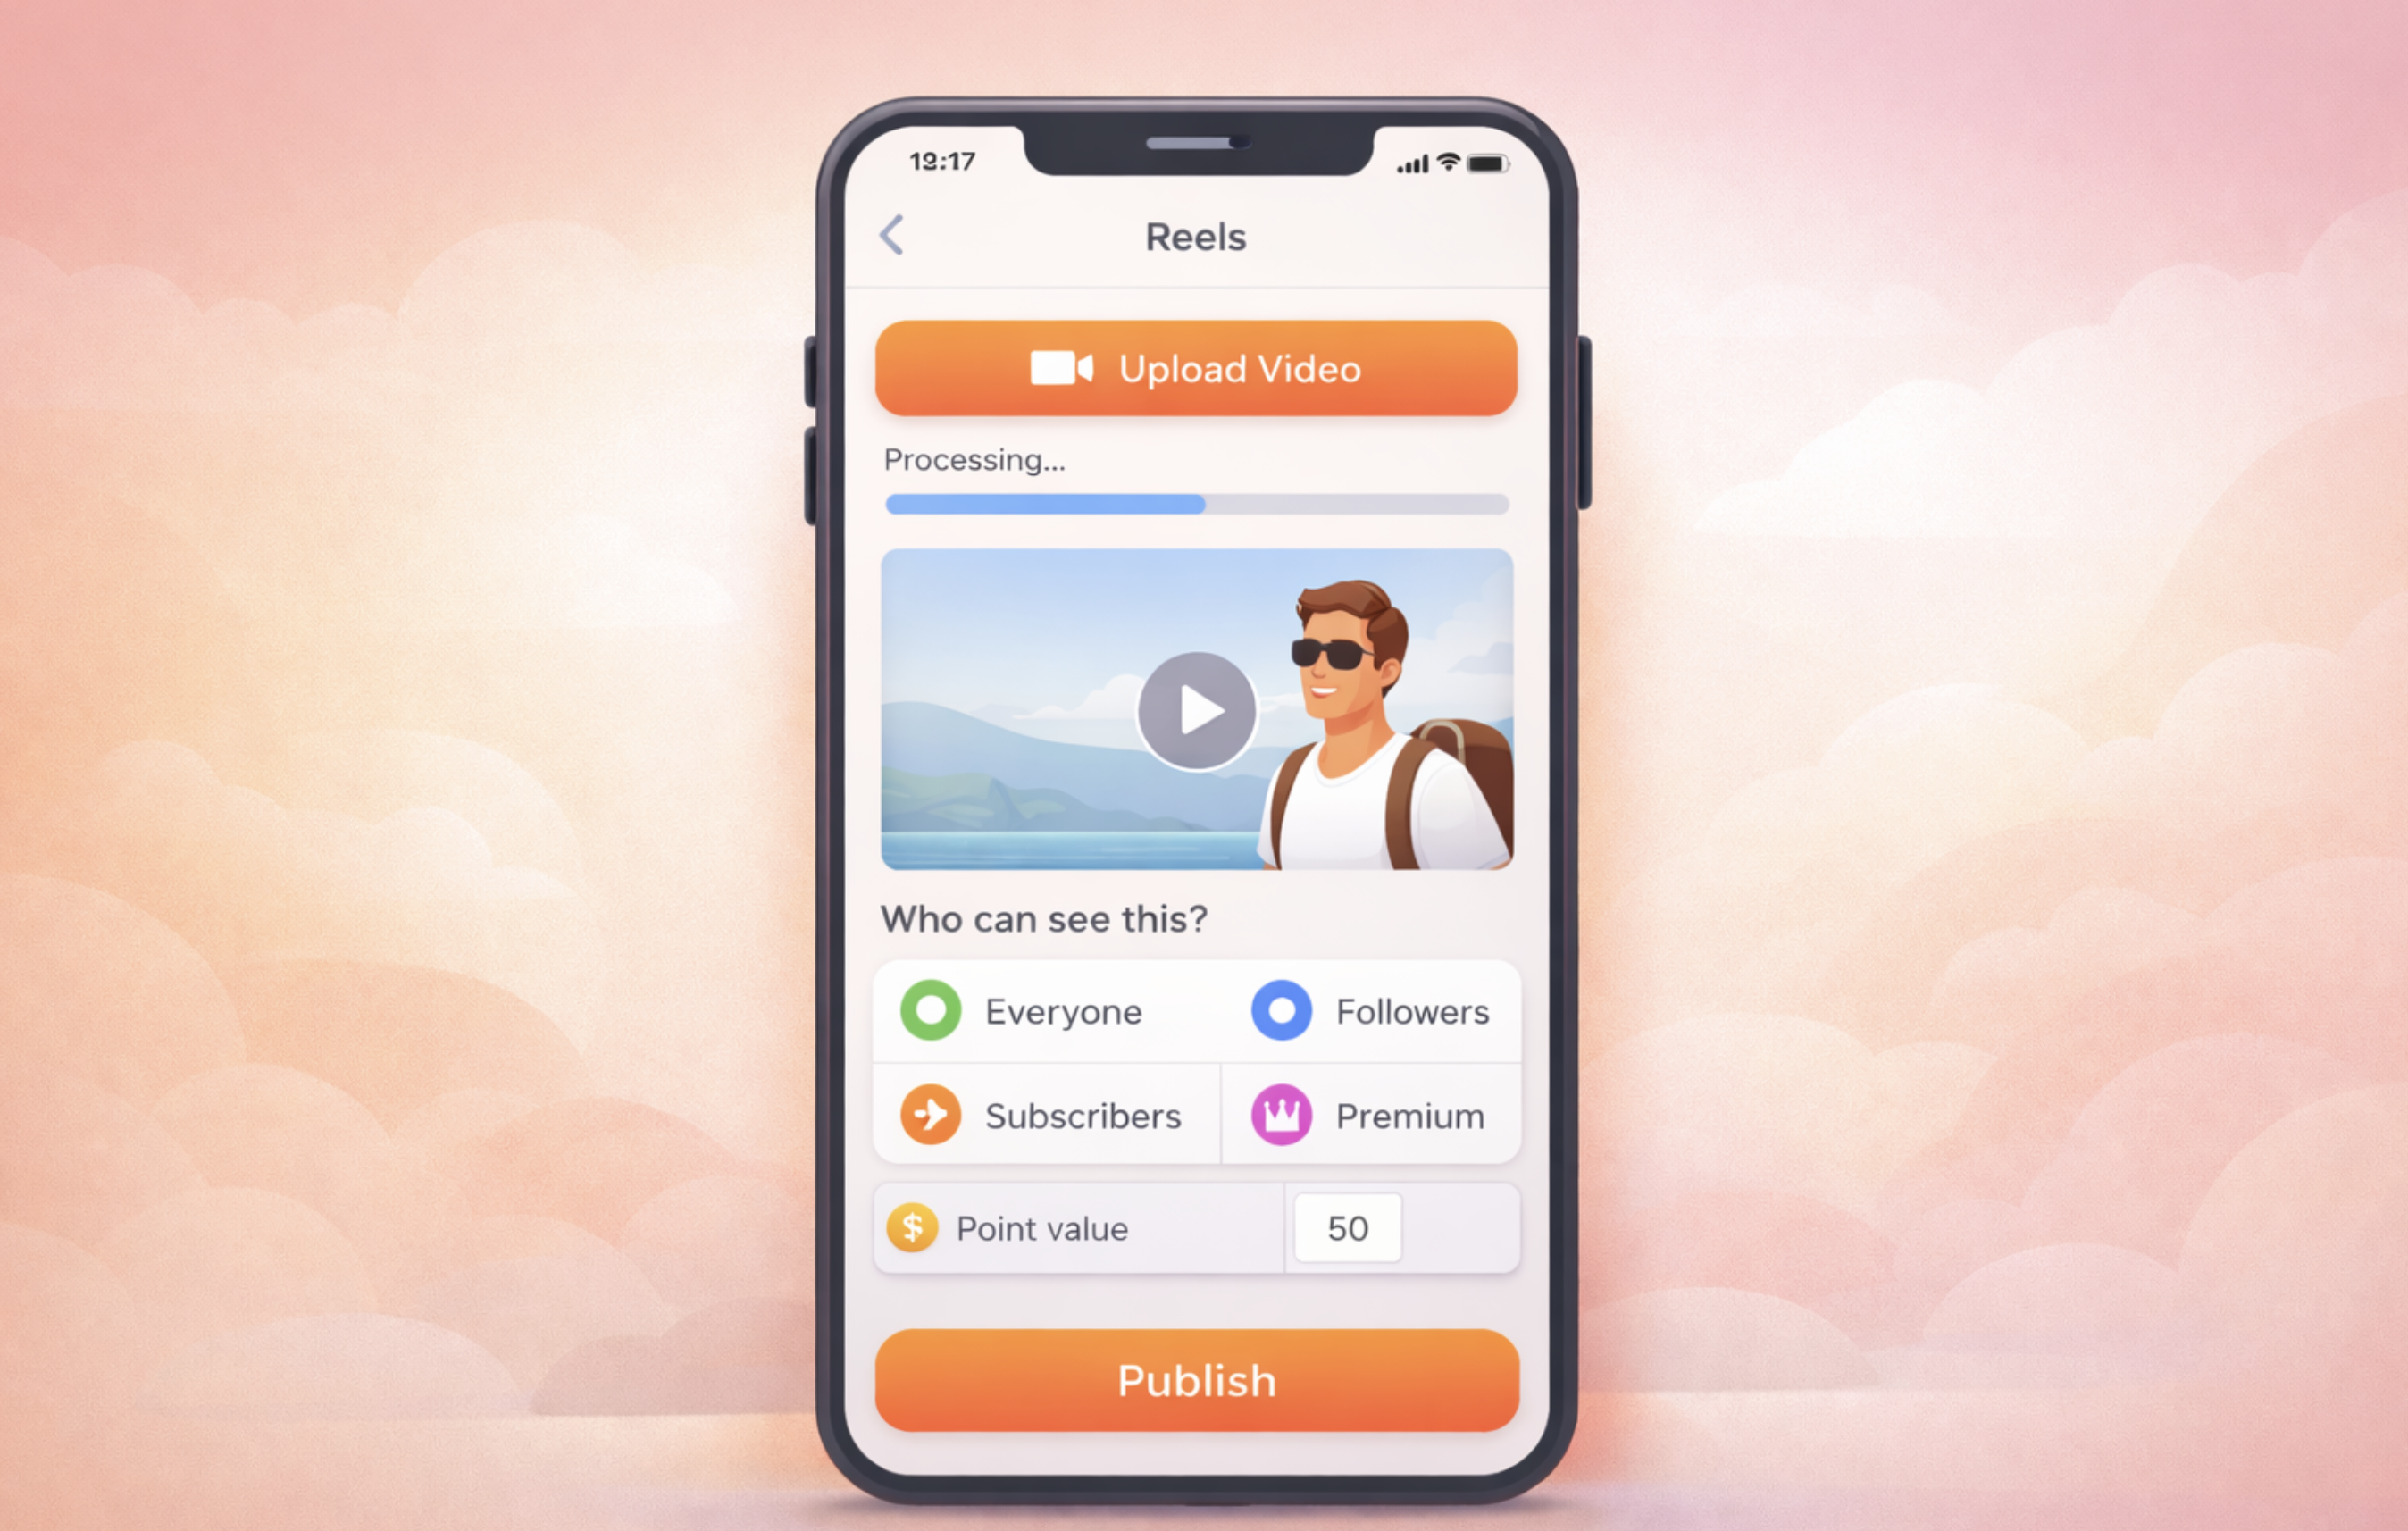
Open the Reels Upload Area
You can start creating a Reels video by selecting “Create Reels” from the “Create New” menu in the post composer, or by navigating directly to the Reels creation page.
Upload Your Video
Use the Reels upload button to select and upload your video file. The system accepts the allowed video formats defined in the admin panel.
If FFMPEG is enabled, the uploaded video is automatically converted to MP4 format. MP4 is not mandatory, as accepted formats depend on the platform configuration.
Processing and Preview
After the upload is completed, the video enters a processing phase and you are redirected to the preview screen. This step may take a short amount of time depending on the video size.
Select Visibility
From the “Who can see this?” section, choose who can access your Reels video:
-
Everyone
-
Followers
-
Subscribers
-
Premium
This allows you to control audience access for each Reels post.
Premium Reels (Optional)
If you choose to publish the Reels as premium content, you must enter the required point value for viewing.
Add a Description and Publish
Write a short description and click the “Publish” button. After publishing, you are redirected to the Reels page.
Notes
-
Reels uploads must be video files.
-
Maximum video duration and file size are subject to the limits defined in platform settings.
-
An active FFMPEG configuration is required for video conversion and preview generation.

Comments